Board and batten makes such a nice accent for walls, and I love that you can completely customize it to your design/home decor style. I wasn't sure if I was ready for a DIY project like this one, but turns out its actually pretty easy to do!
Materials needed for this project:
- Primed MDF wood in sizes 1x2, 1x3, 1x4
1x2 link
1x3 link
1x4 link - rounded trim (depending on your baseboards - keep reading for more info on that)
- tube of liquid nail - linked here
- tube of caulk - we used this one
- caulk gun - we have this one
- brad nails
- hammer
- paint - We used "Pure White" by Sherwin Williams (SW 7005)
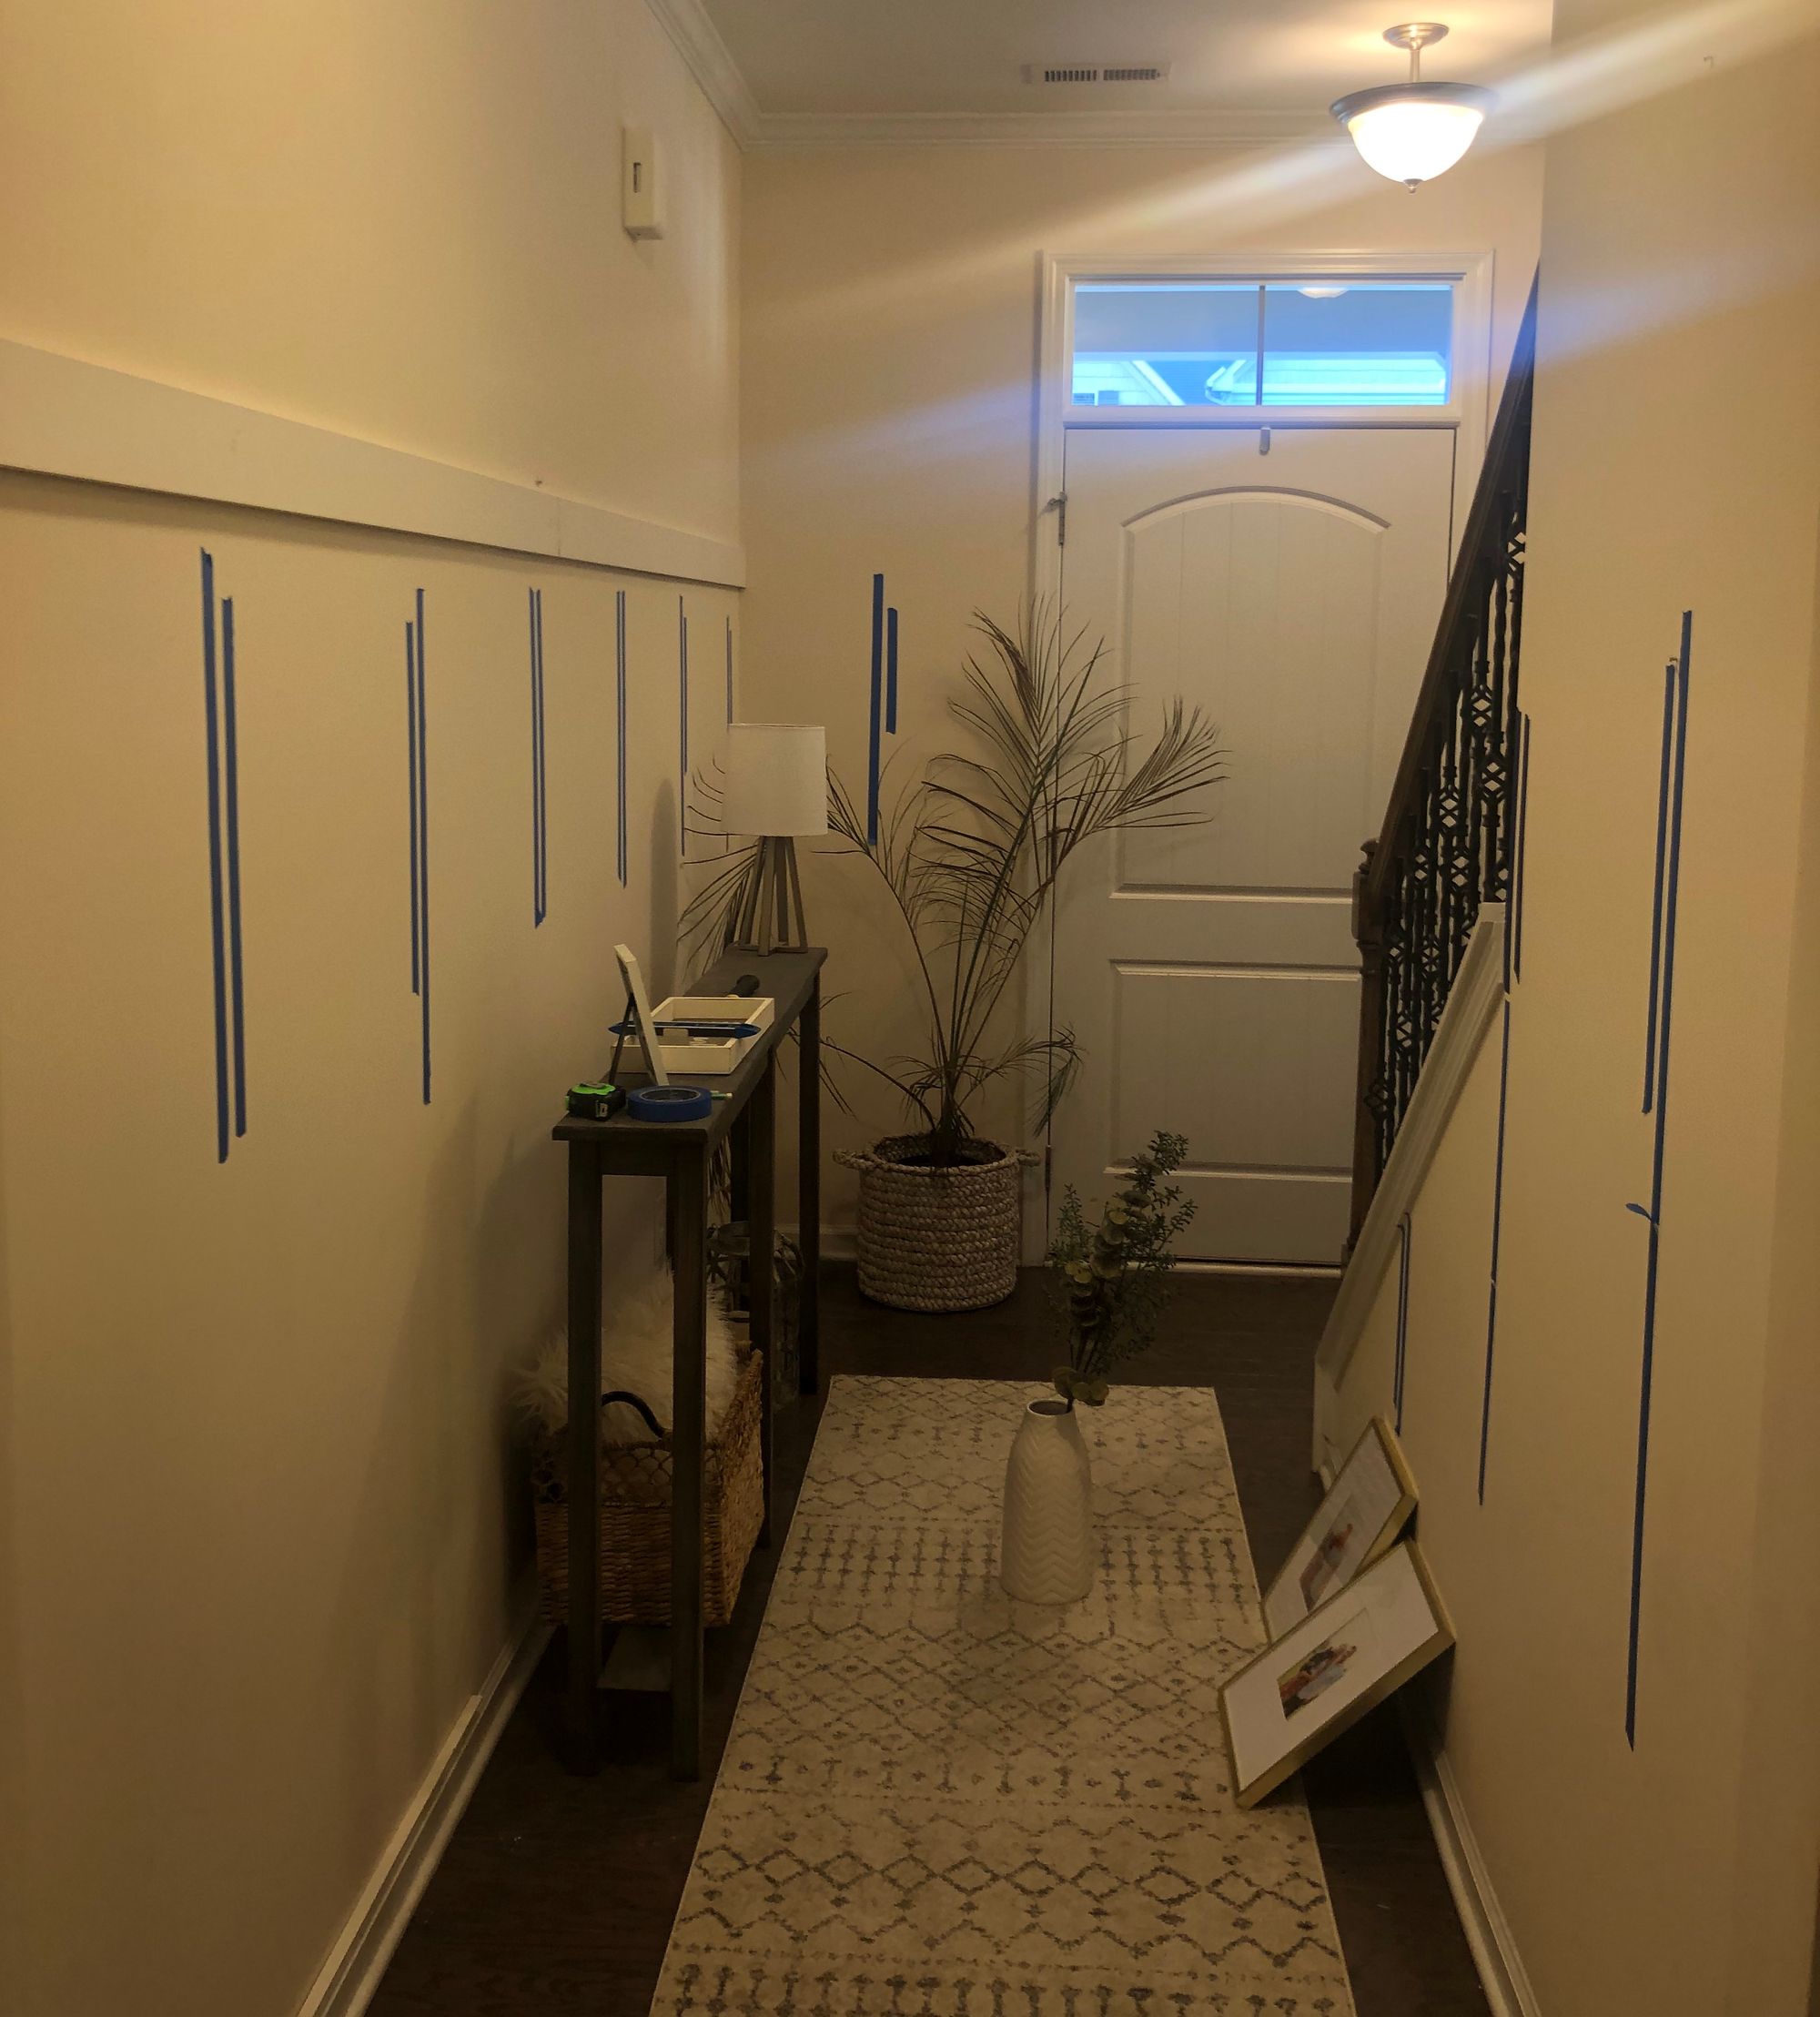
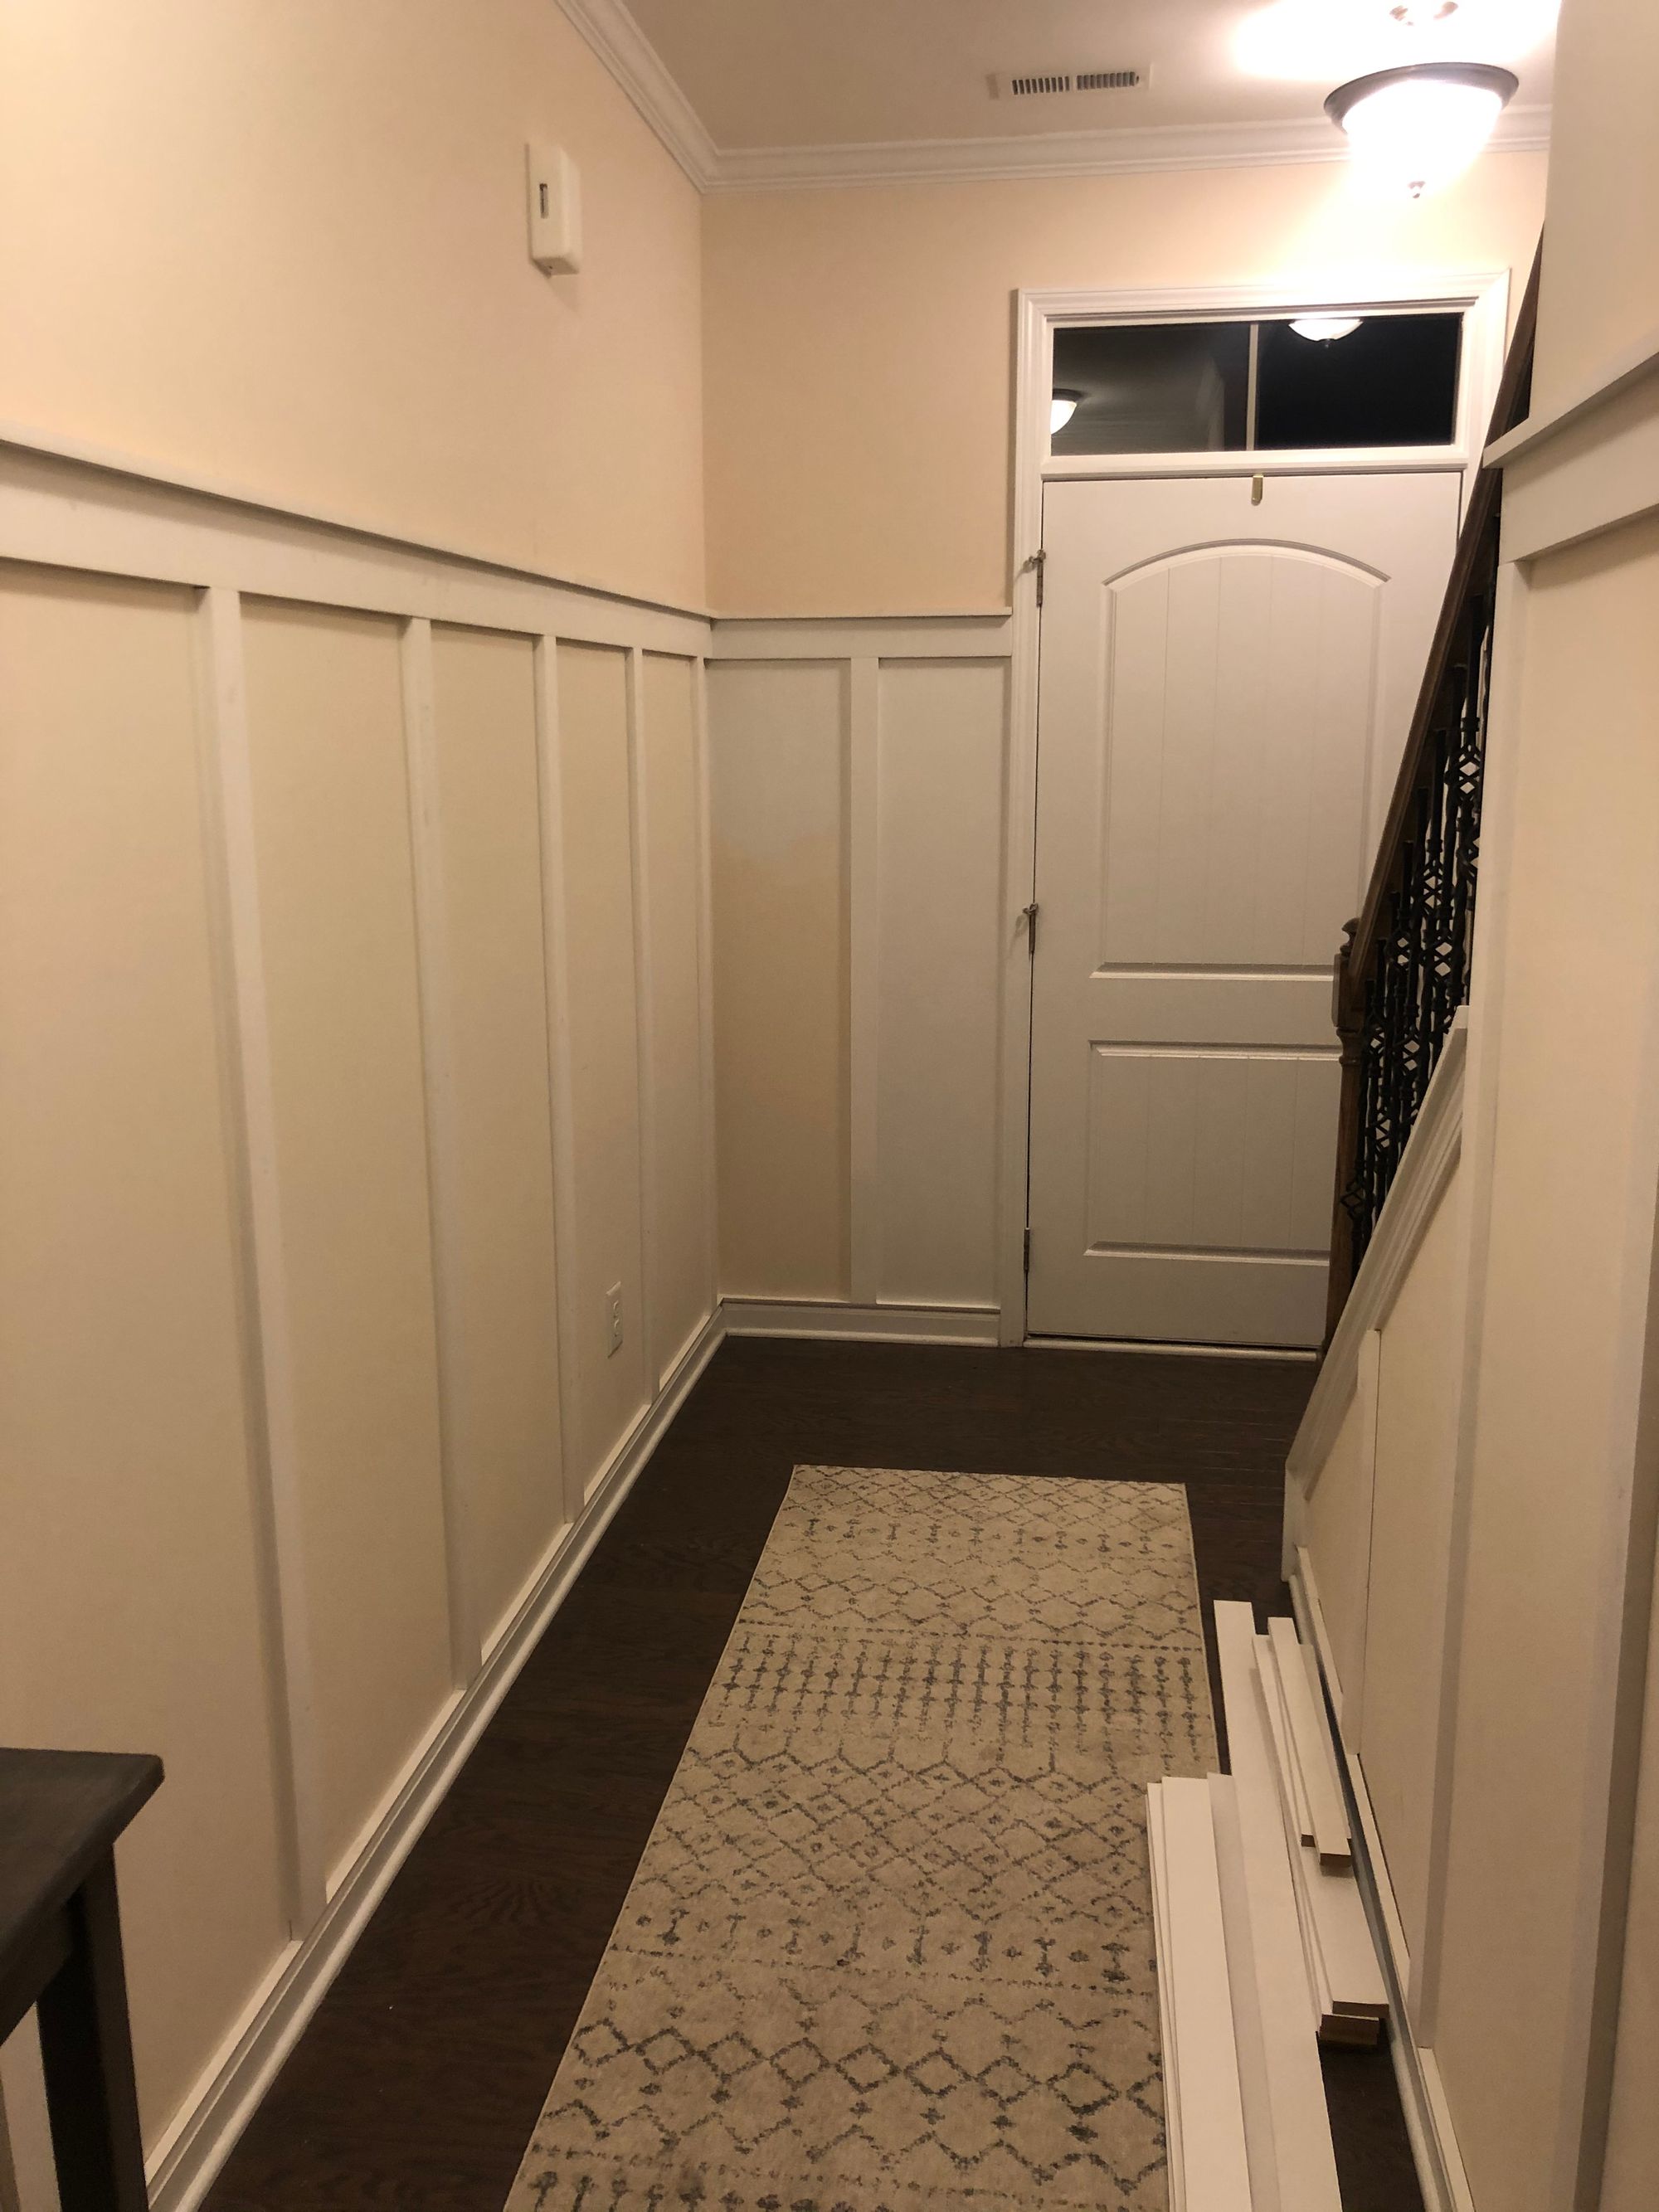
To start off, we taped off our walls with painters tape so we could visualize the height and widths for the wood strips and moved them around until we found a spacing/height we liked. (We chose 70 inches tall, with 21 inches of wall between each wood slat):
Next, we used the 1x4 primed MDF wood to line the wall as the horizontal strip (already placed in the picture above). Make sure you use a level to ensure it is level all the way across! We used liquid nail (linked above) with the caulk gun, and put a line of liquid nail down the wood, placed it up horizontally, and then one of us would hold it while the other hammered in the brad nails. A nail gun would be useful for this project but totally not necessary. We don't have a nail gun, and didn't want to buy one and got the project done with no problems. We put a nail about every 3 feet. The only thing to ensure is that when you nail them in, make sure they are nailed all the way in, to be flush with the food, or even in further than the wood's edge, so they wont show later.
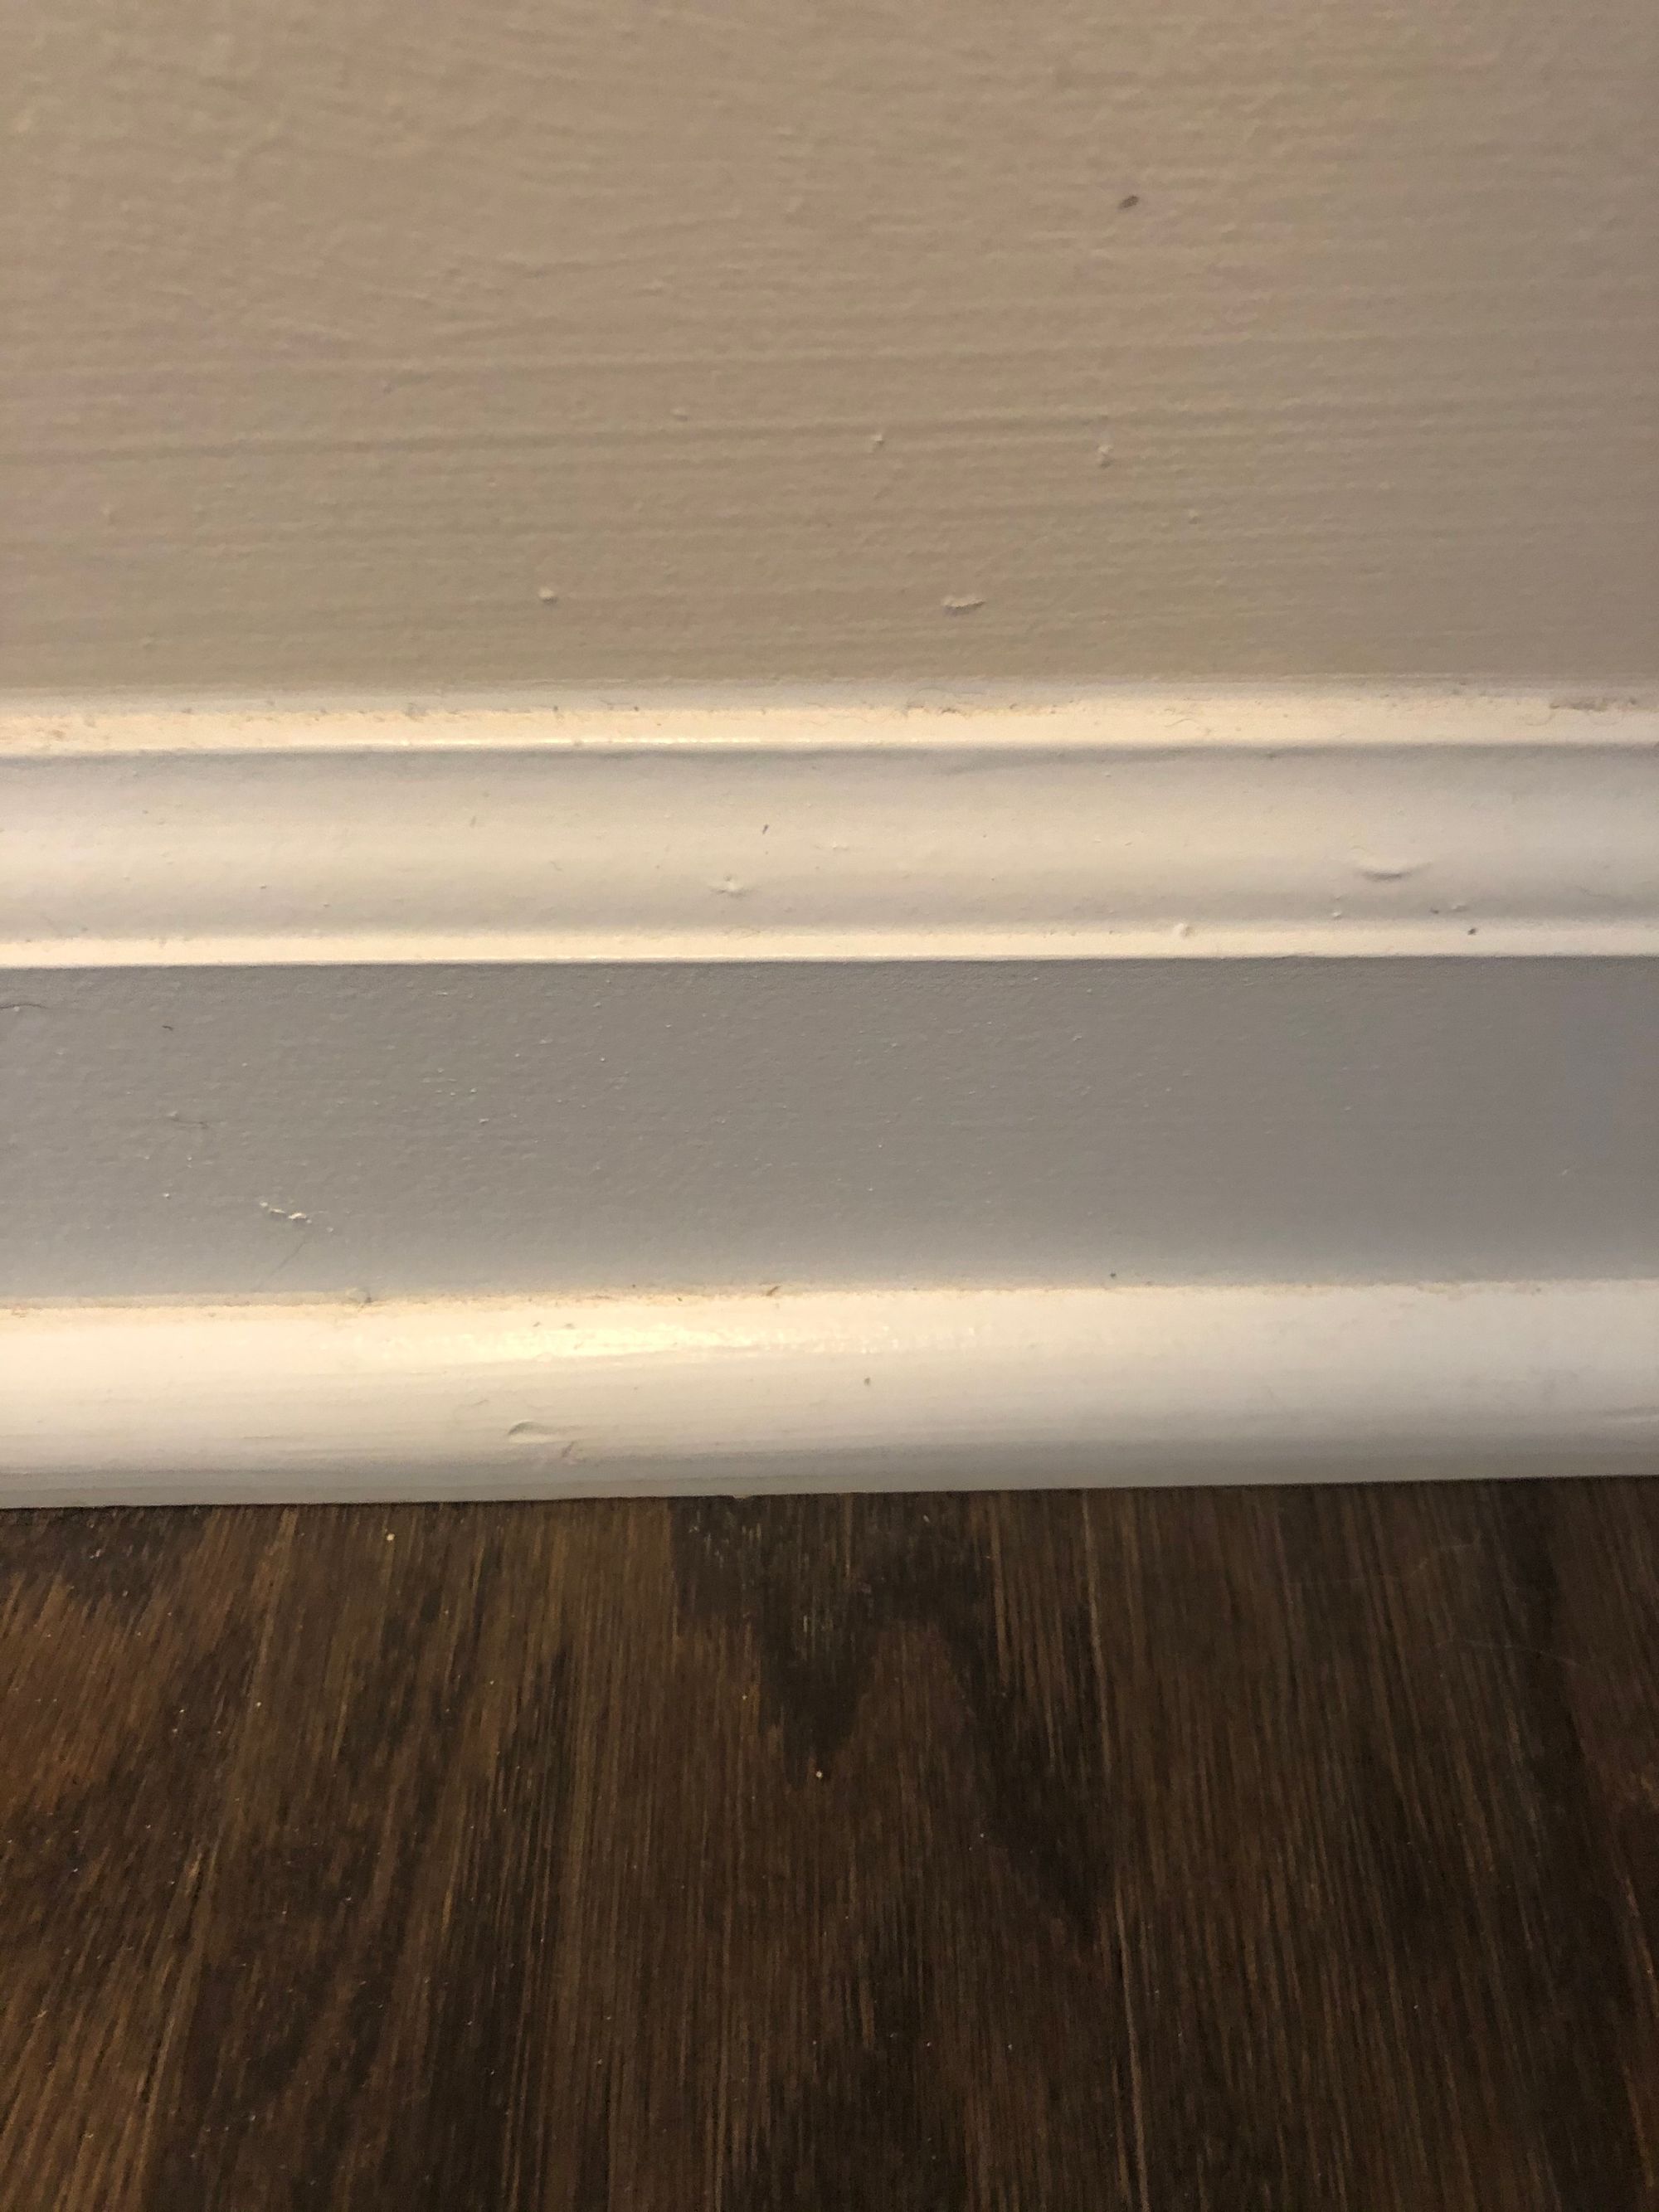
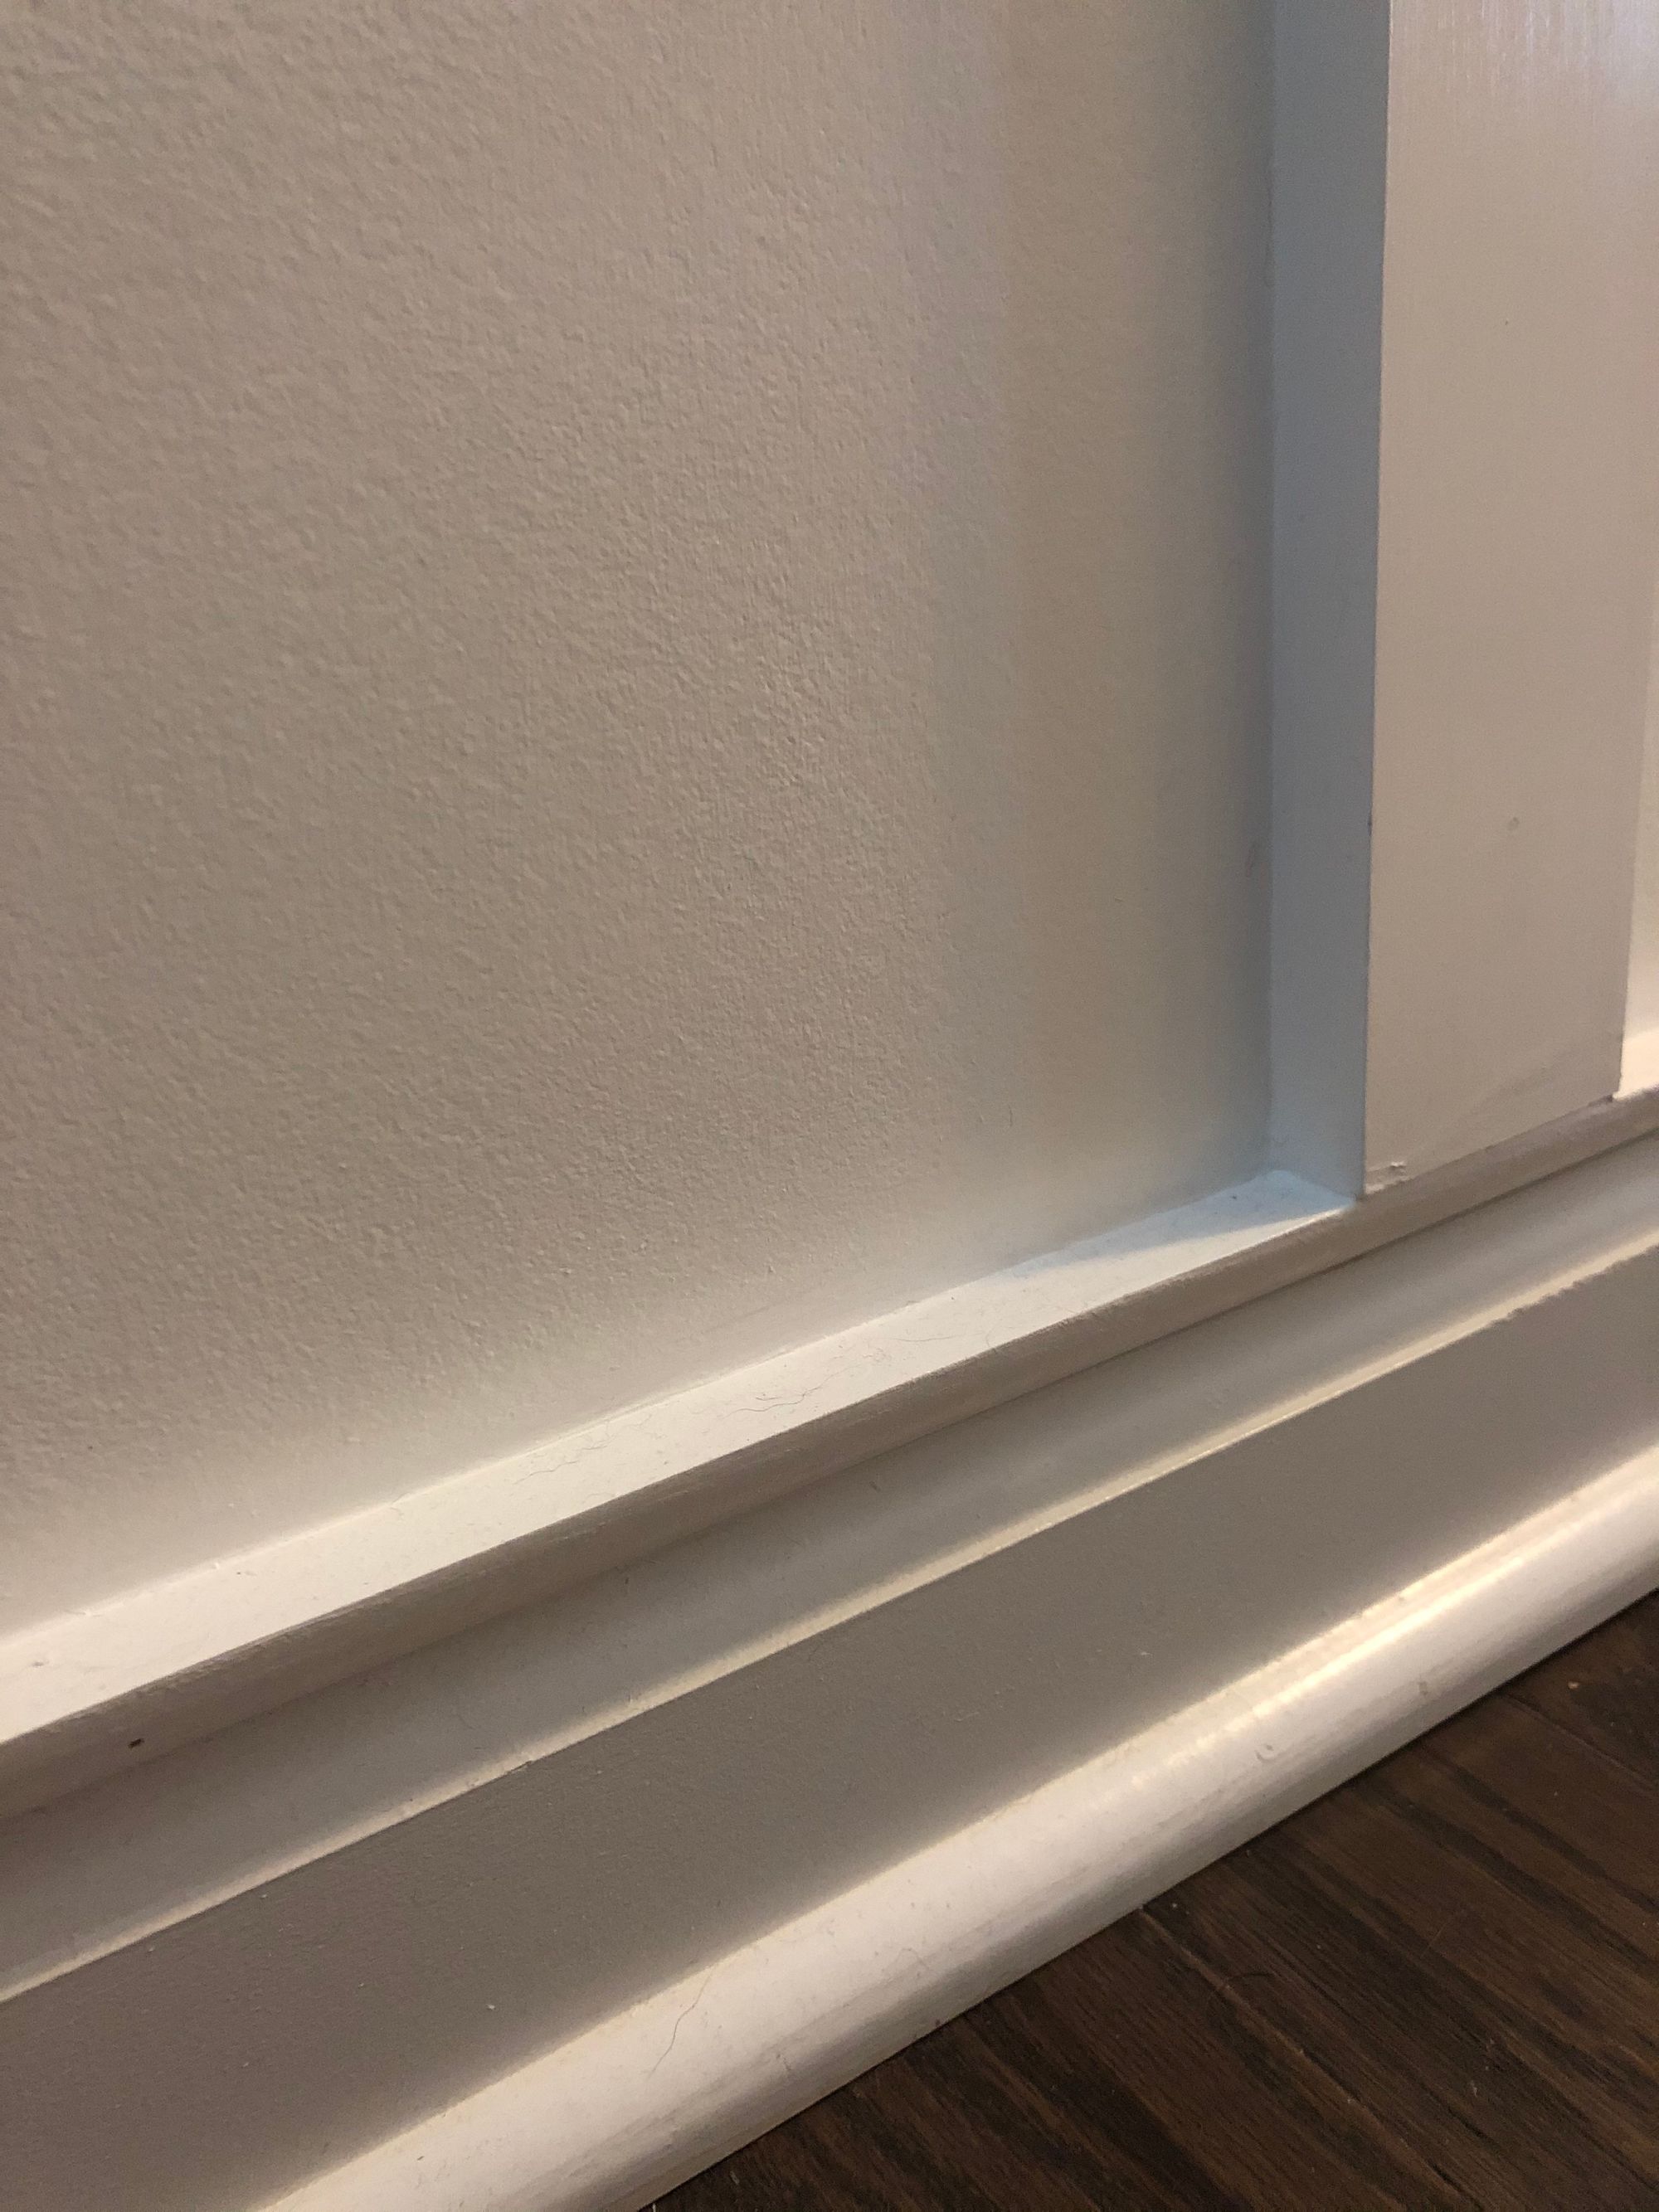
Here is the optional baseboard part - Depending on what style of baseboards you have, the wood slats might be thicker than the top of your baseboards, and therefore not line up exactly. Our baseboards were only about 1/8th of an inch at the top, so it would leave overhang with the vertical slats, and look sloppy. We got around this by adding some simple molding, that made our baseboards extend to the 1 inch needed size. We used molding like this one: https://www.lowes.com/pd/21-32-in-x-12-ft-Painted-Quarter-Round-Moulding/3402000
See before and after pics below:
From there, you can start arranging your vertical slats. We have a miter saw that we used to cut them to the right heights, you can get one pretty cheap, or you can have Lowes/Home Depot cut them (but this is tricky since most homes aren't 100% level so each vertical wood piece was actually a slightly different height) so Id recommend investing in a cheap miter saw, you wont regret it!
As mentioned above, we put a line of liquid nail (wood glue) down each vertical slat, and stuck it up on the wall and then applied 3 nails to each slat (one at the top, one in the middle, and one at the bottom). For the vertical slats, we used the 1x3 primed MDF wood, and as mentioned above, we did 21 inches of wall between each slat.
Once you are done with the verticals, the final piece of the wood is to add the final trim. We used 1x2 primed MDF boards for the top trim. This part is optional, but I think it adds a nice finishing touch. Once we were done with that, ours looked like this (peep the one column I had already painted):
From here, all of the wood work is done! The final steps include caulking the nail holes and the lines where the wood meet. (caulk we used linked above). For caulking the nail holes, I just put a small dab on your finger and just run over each nail to fill the hole. For the lines/cracks, you can use your caulk gun to run a thin line (it doesn't take much) across each line, and then run your finger over it to press it in place, and remove excess. (if you're unsure, this video explains really well) https://www.youtube.com/watch?v=CsNTqR6xWoY
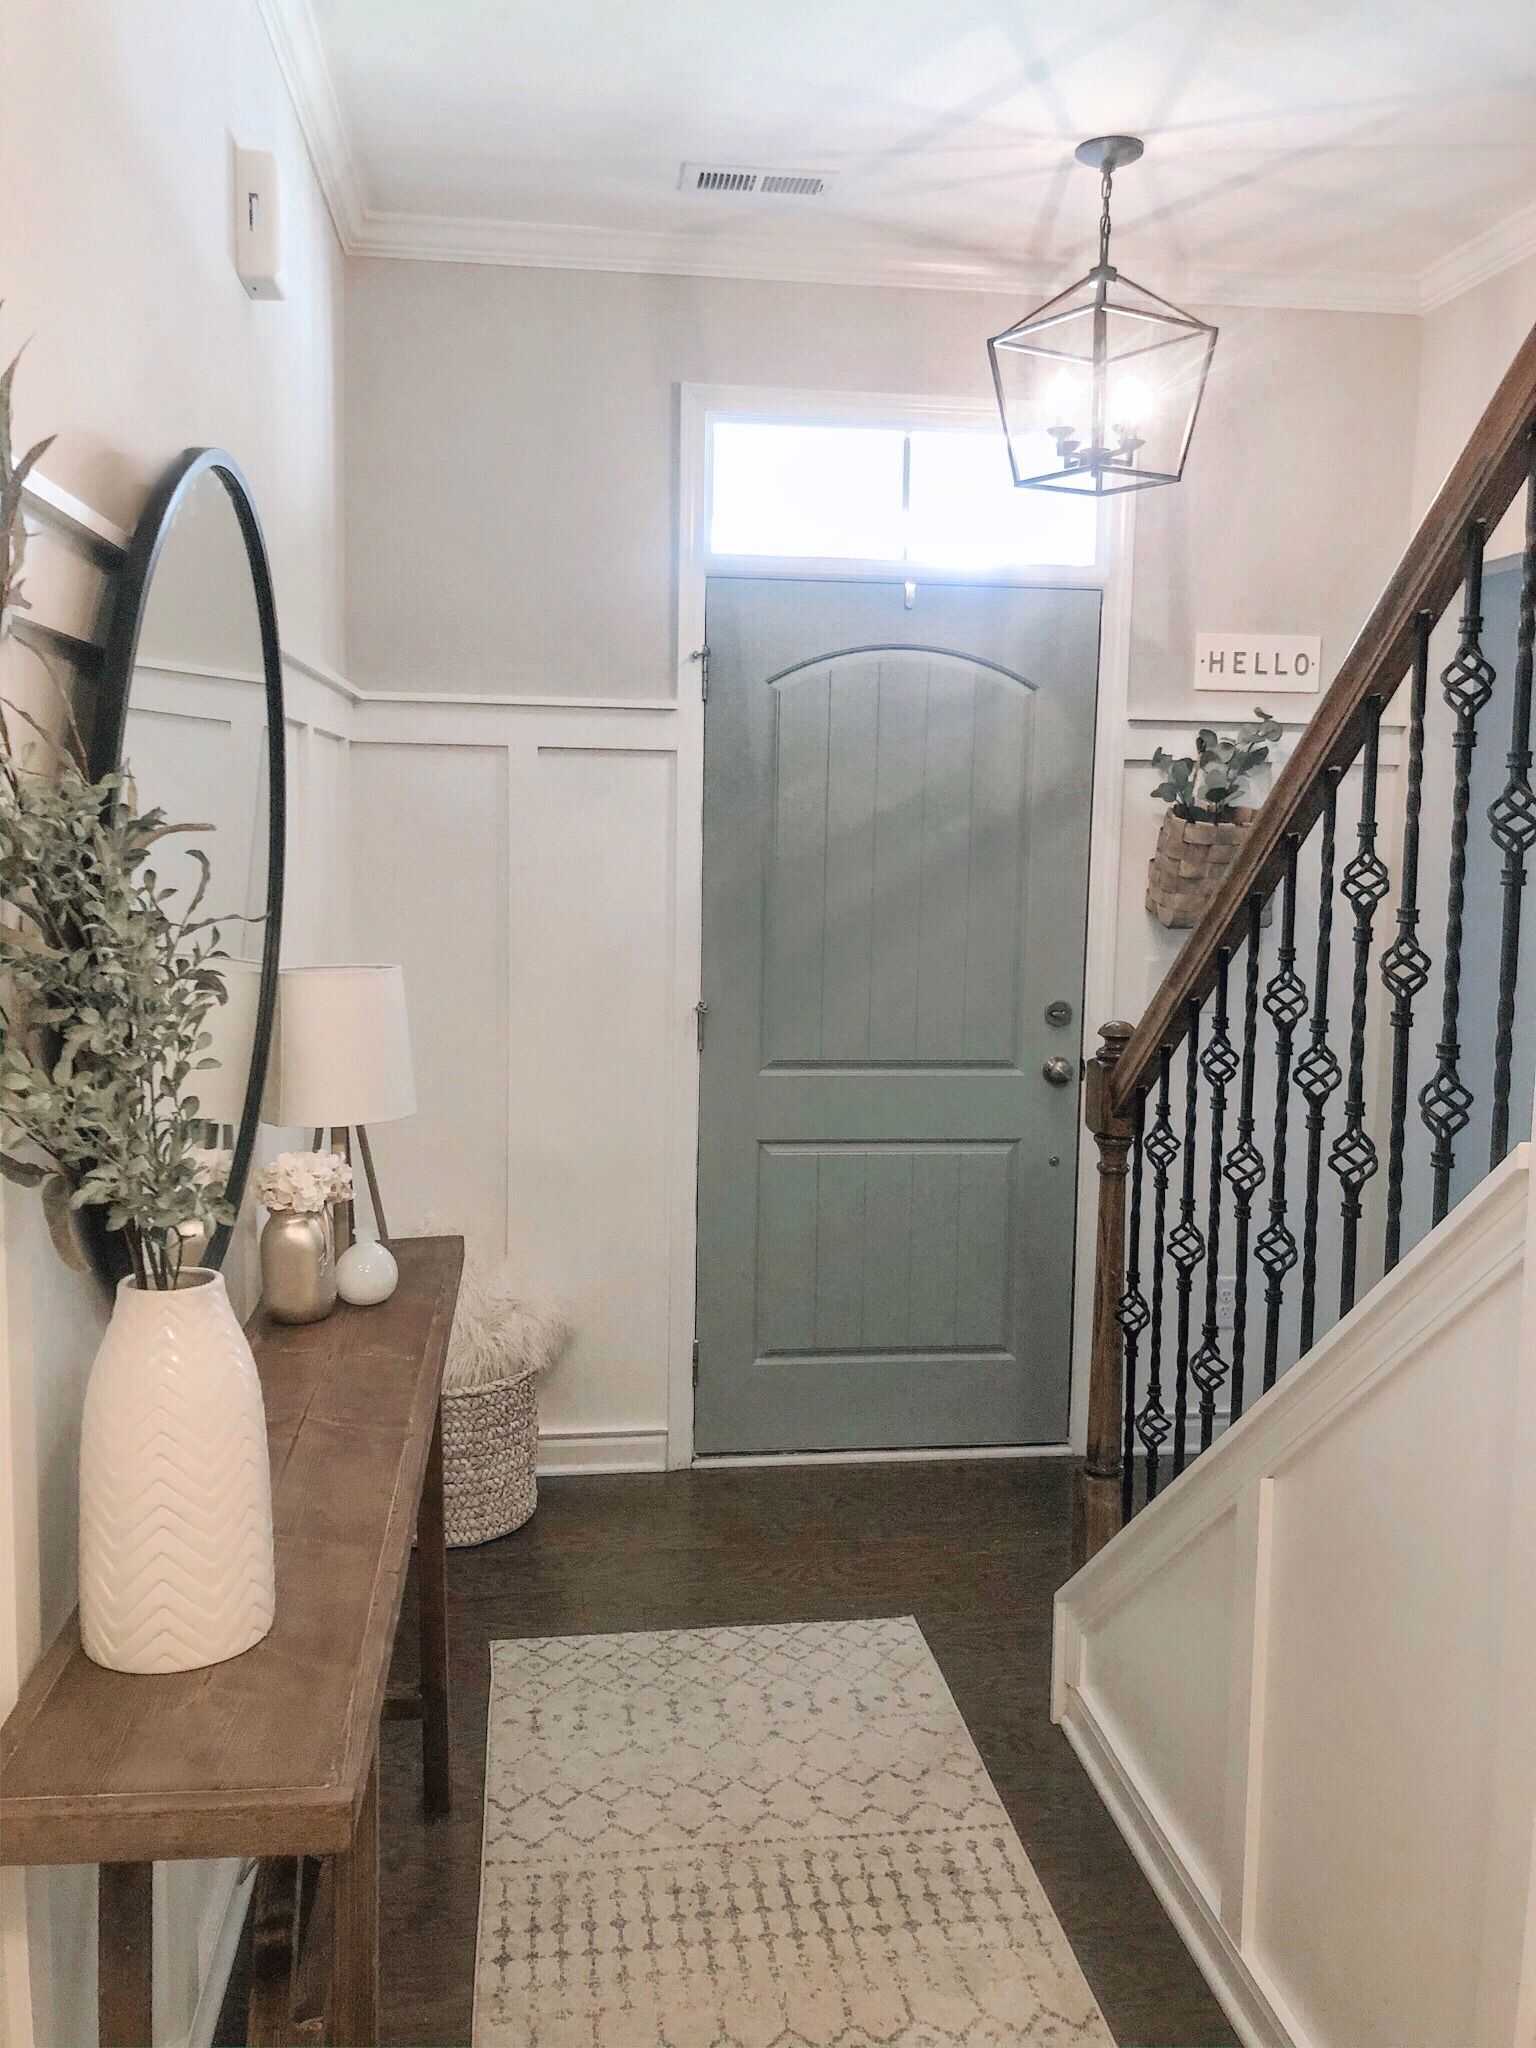
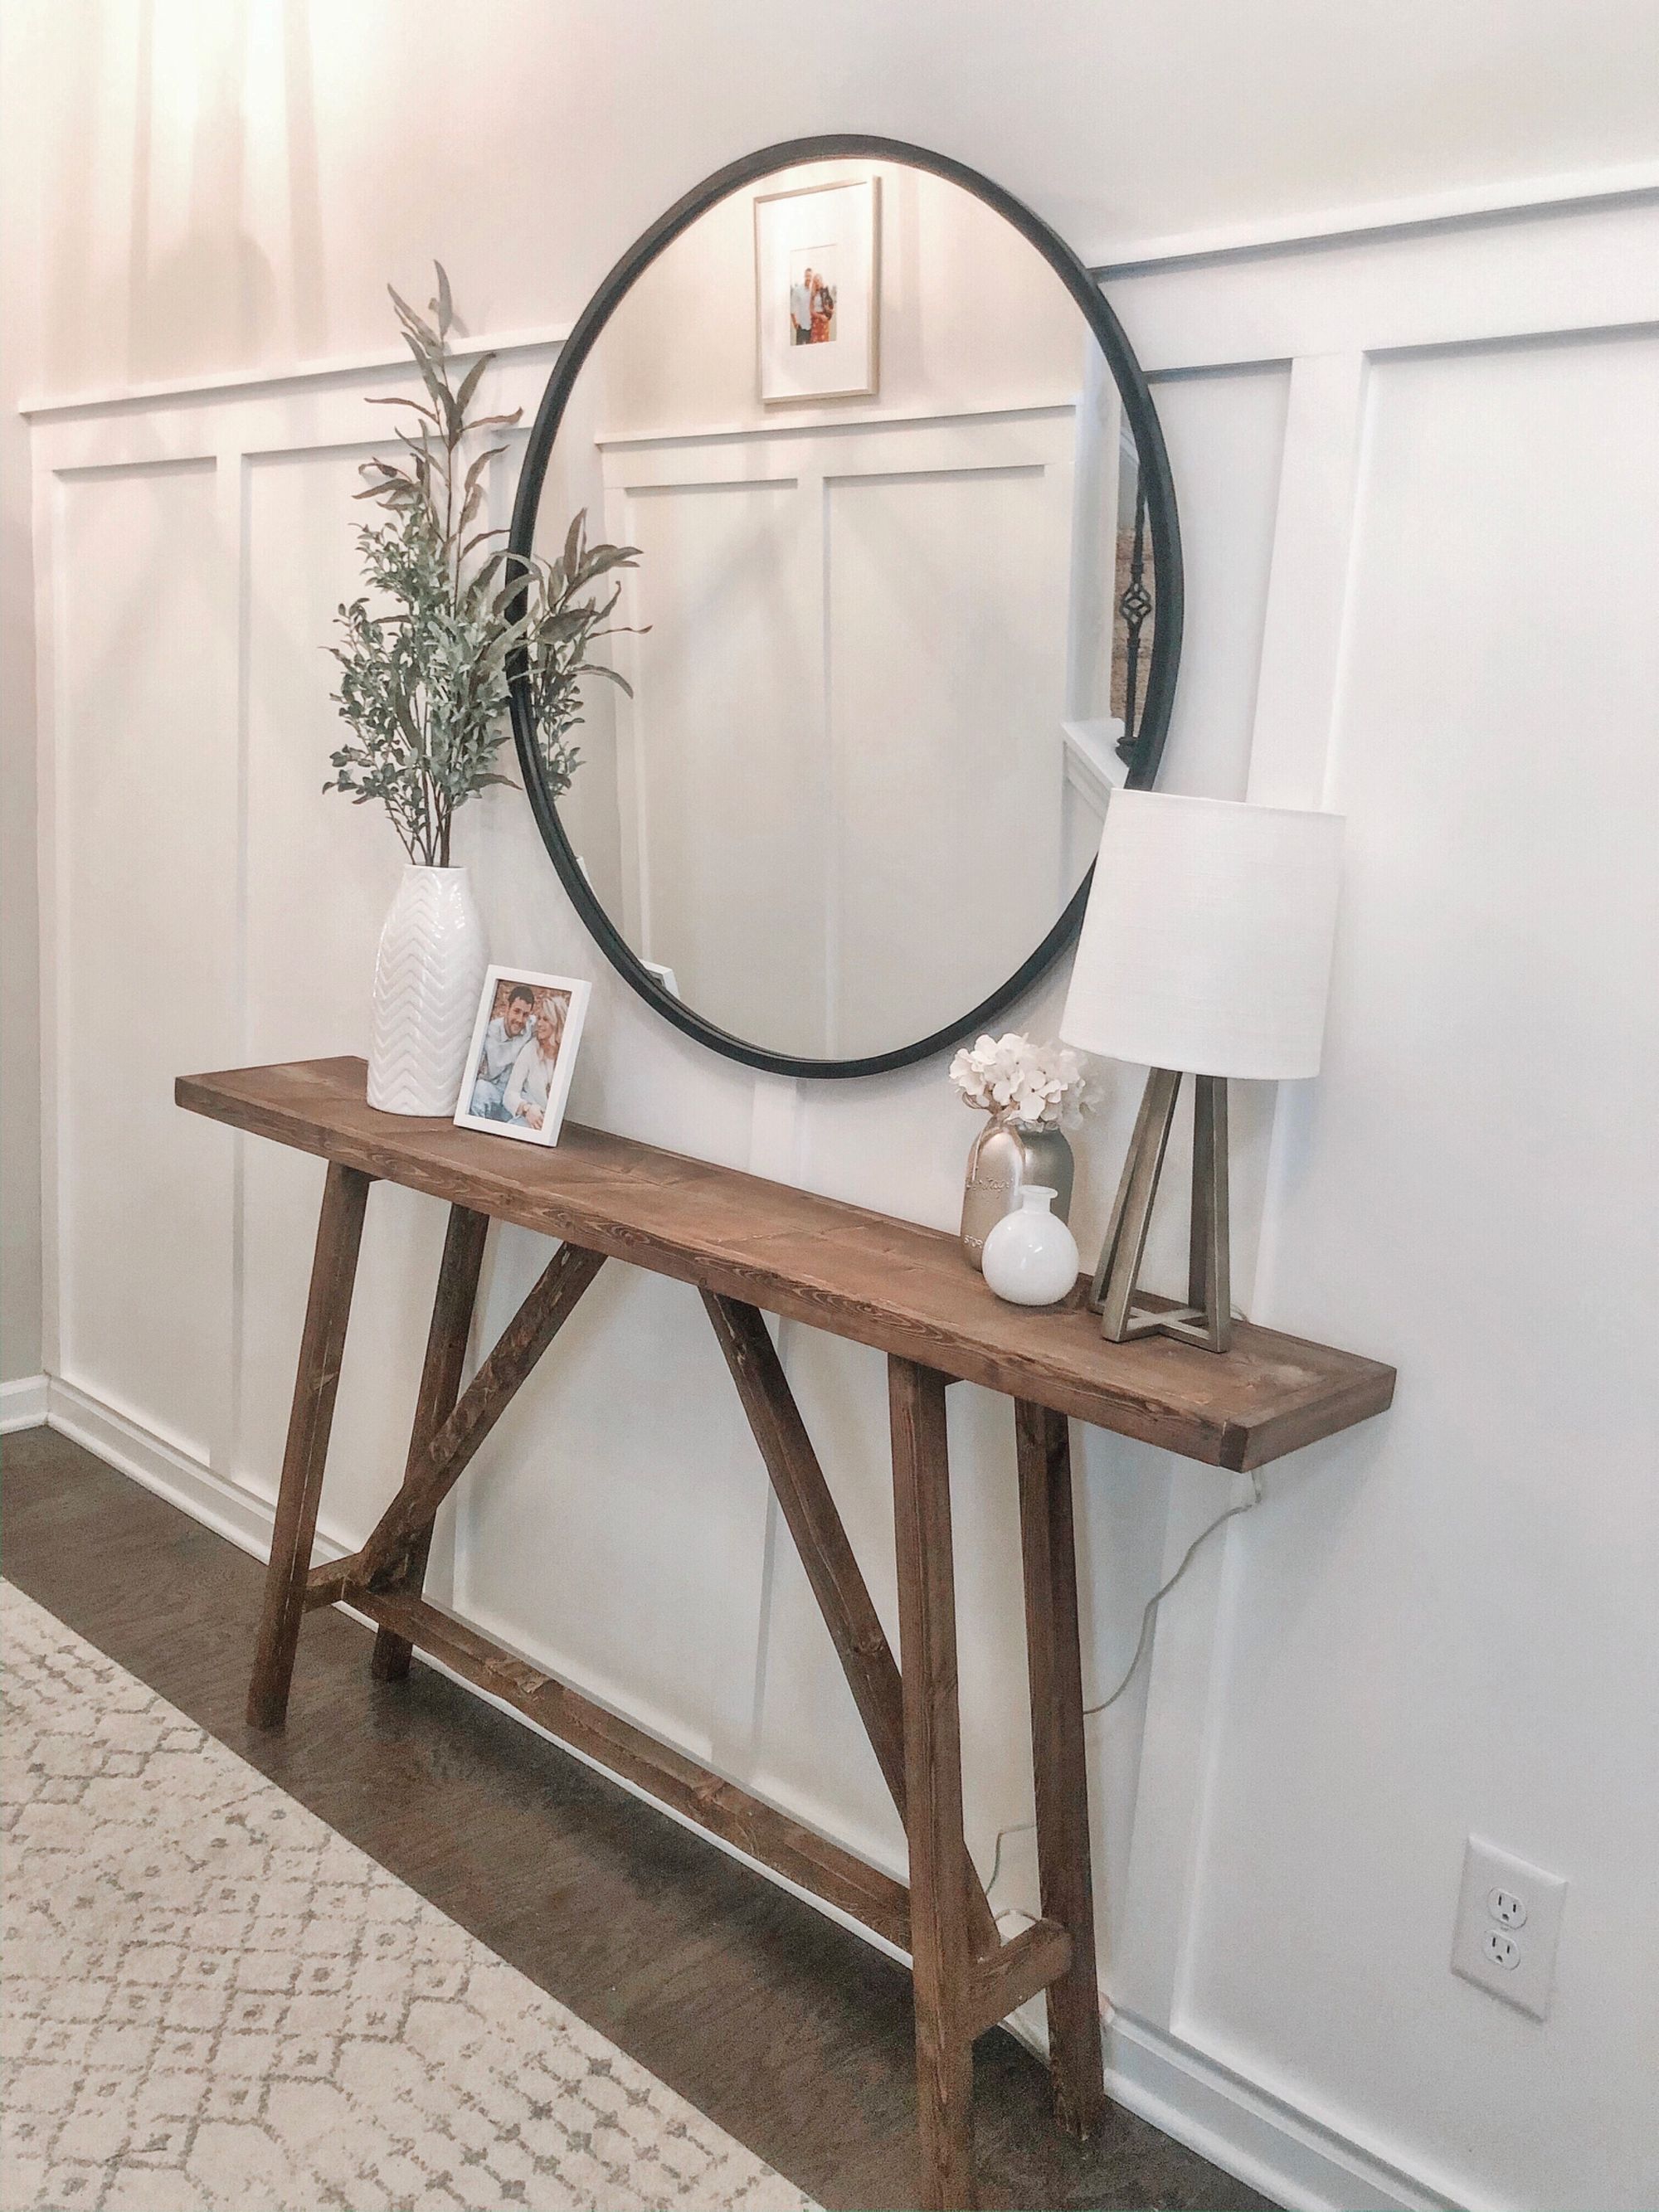
Let your caulk dry for a few hours, and then your final step is to paint your trim and wall whatever color you want your board and batten to be! Ours is "Pure White" by Sherwin Williams.
It sounds like a lot of steps but its really not bad once you get going. I ended up adding the same board and batten in my mud room, (a smaller space), but I was able to complete that project in just a few hours.
Happy DIY-ing!
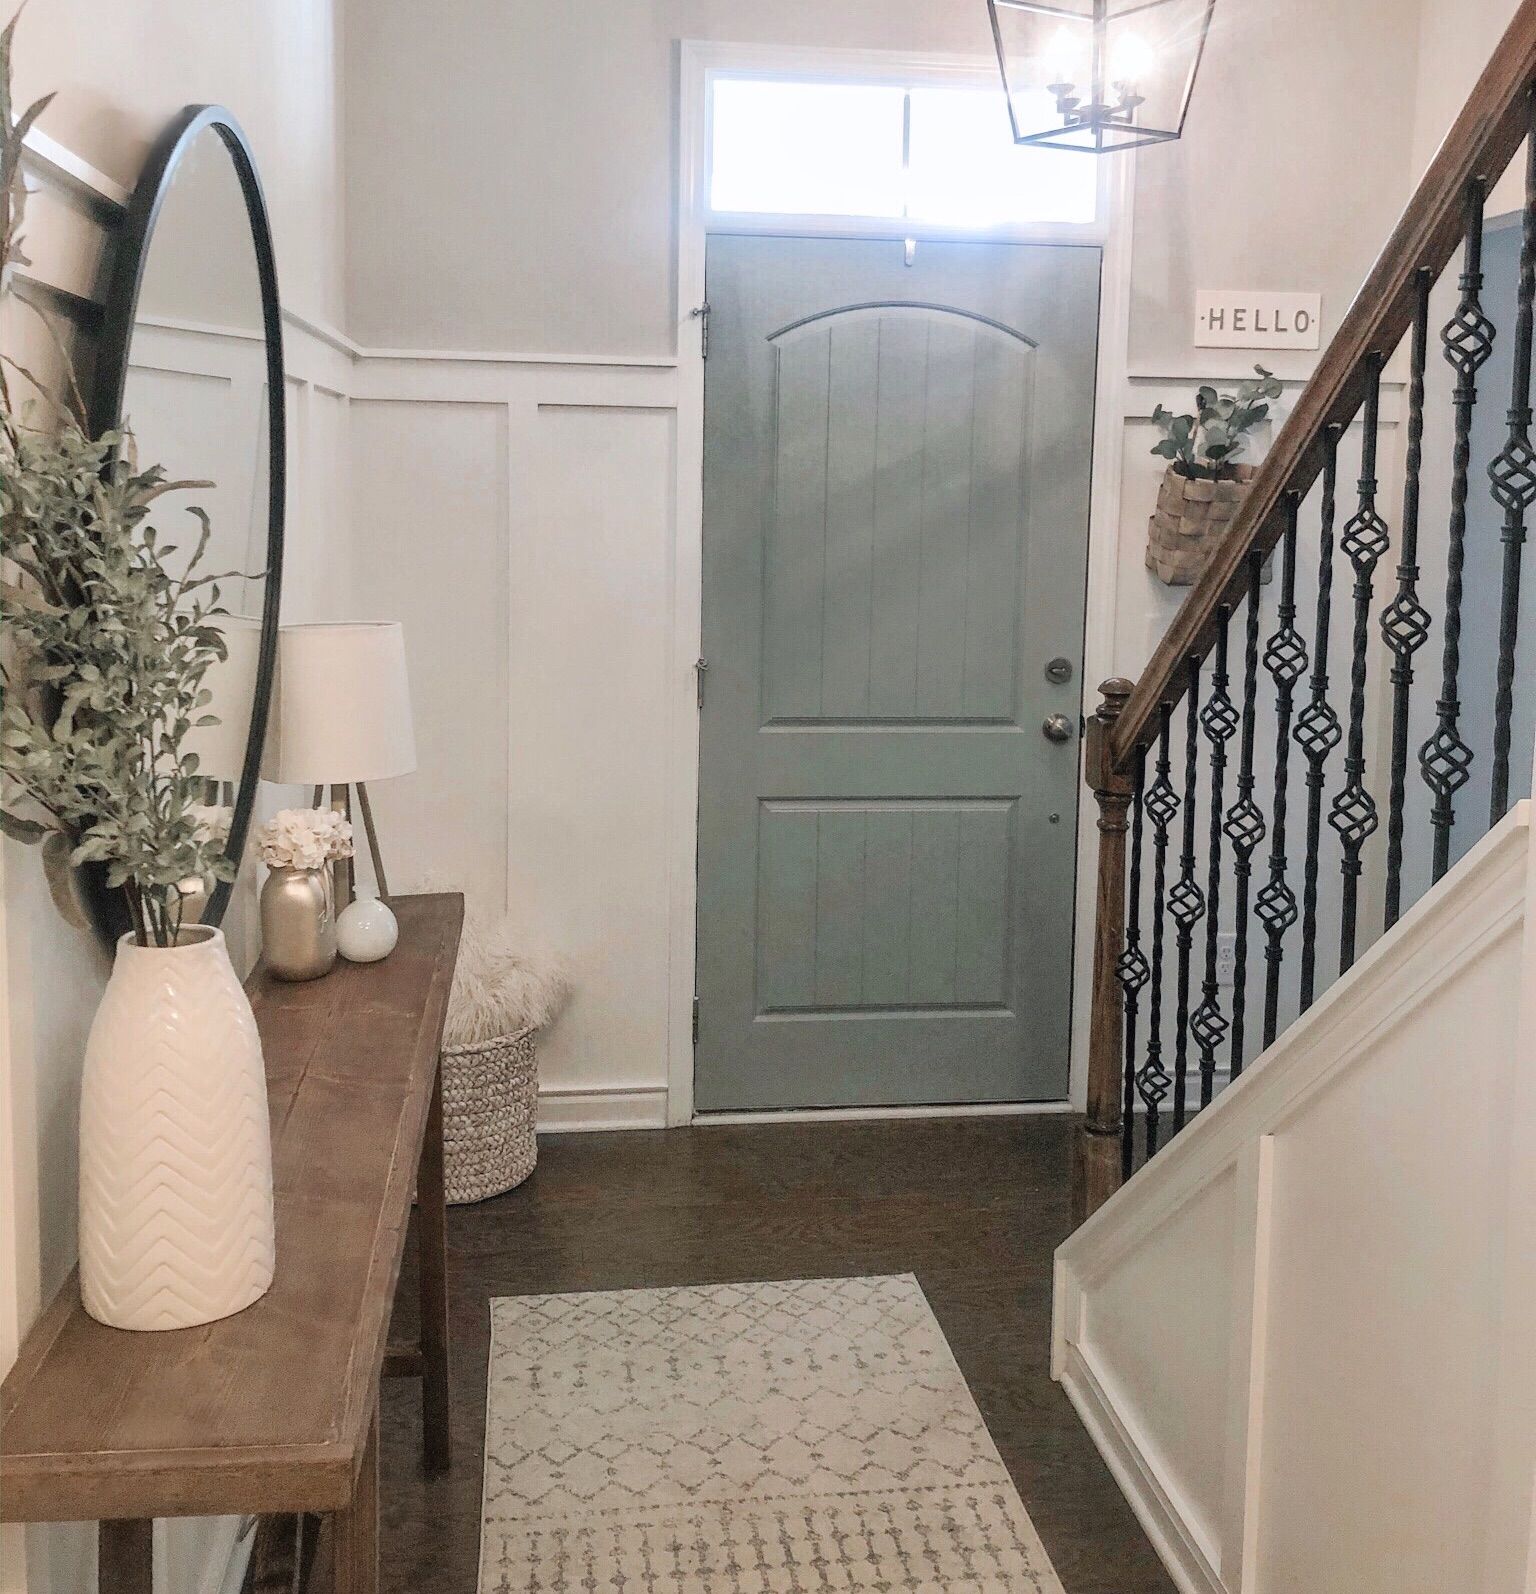
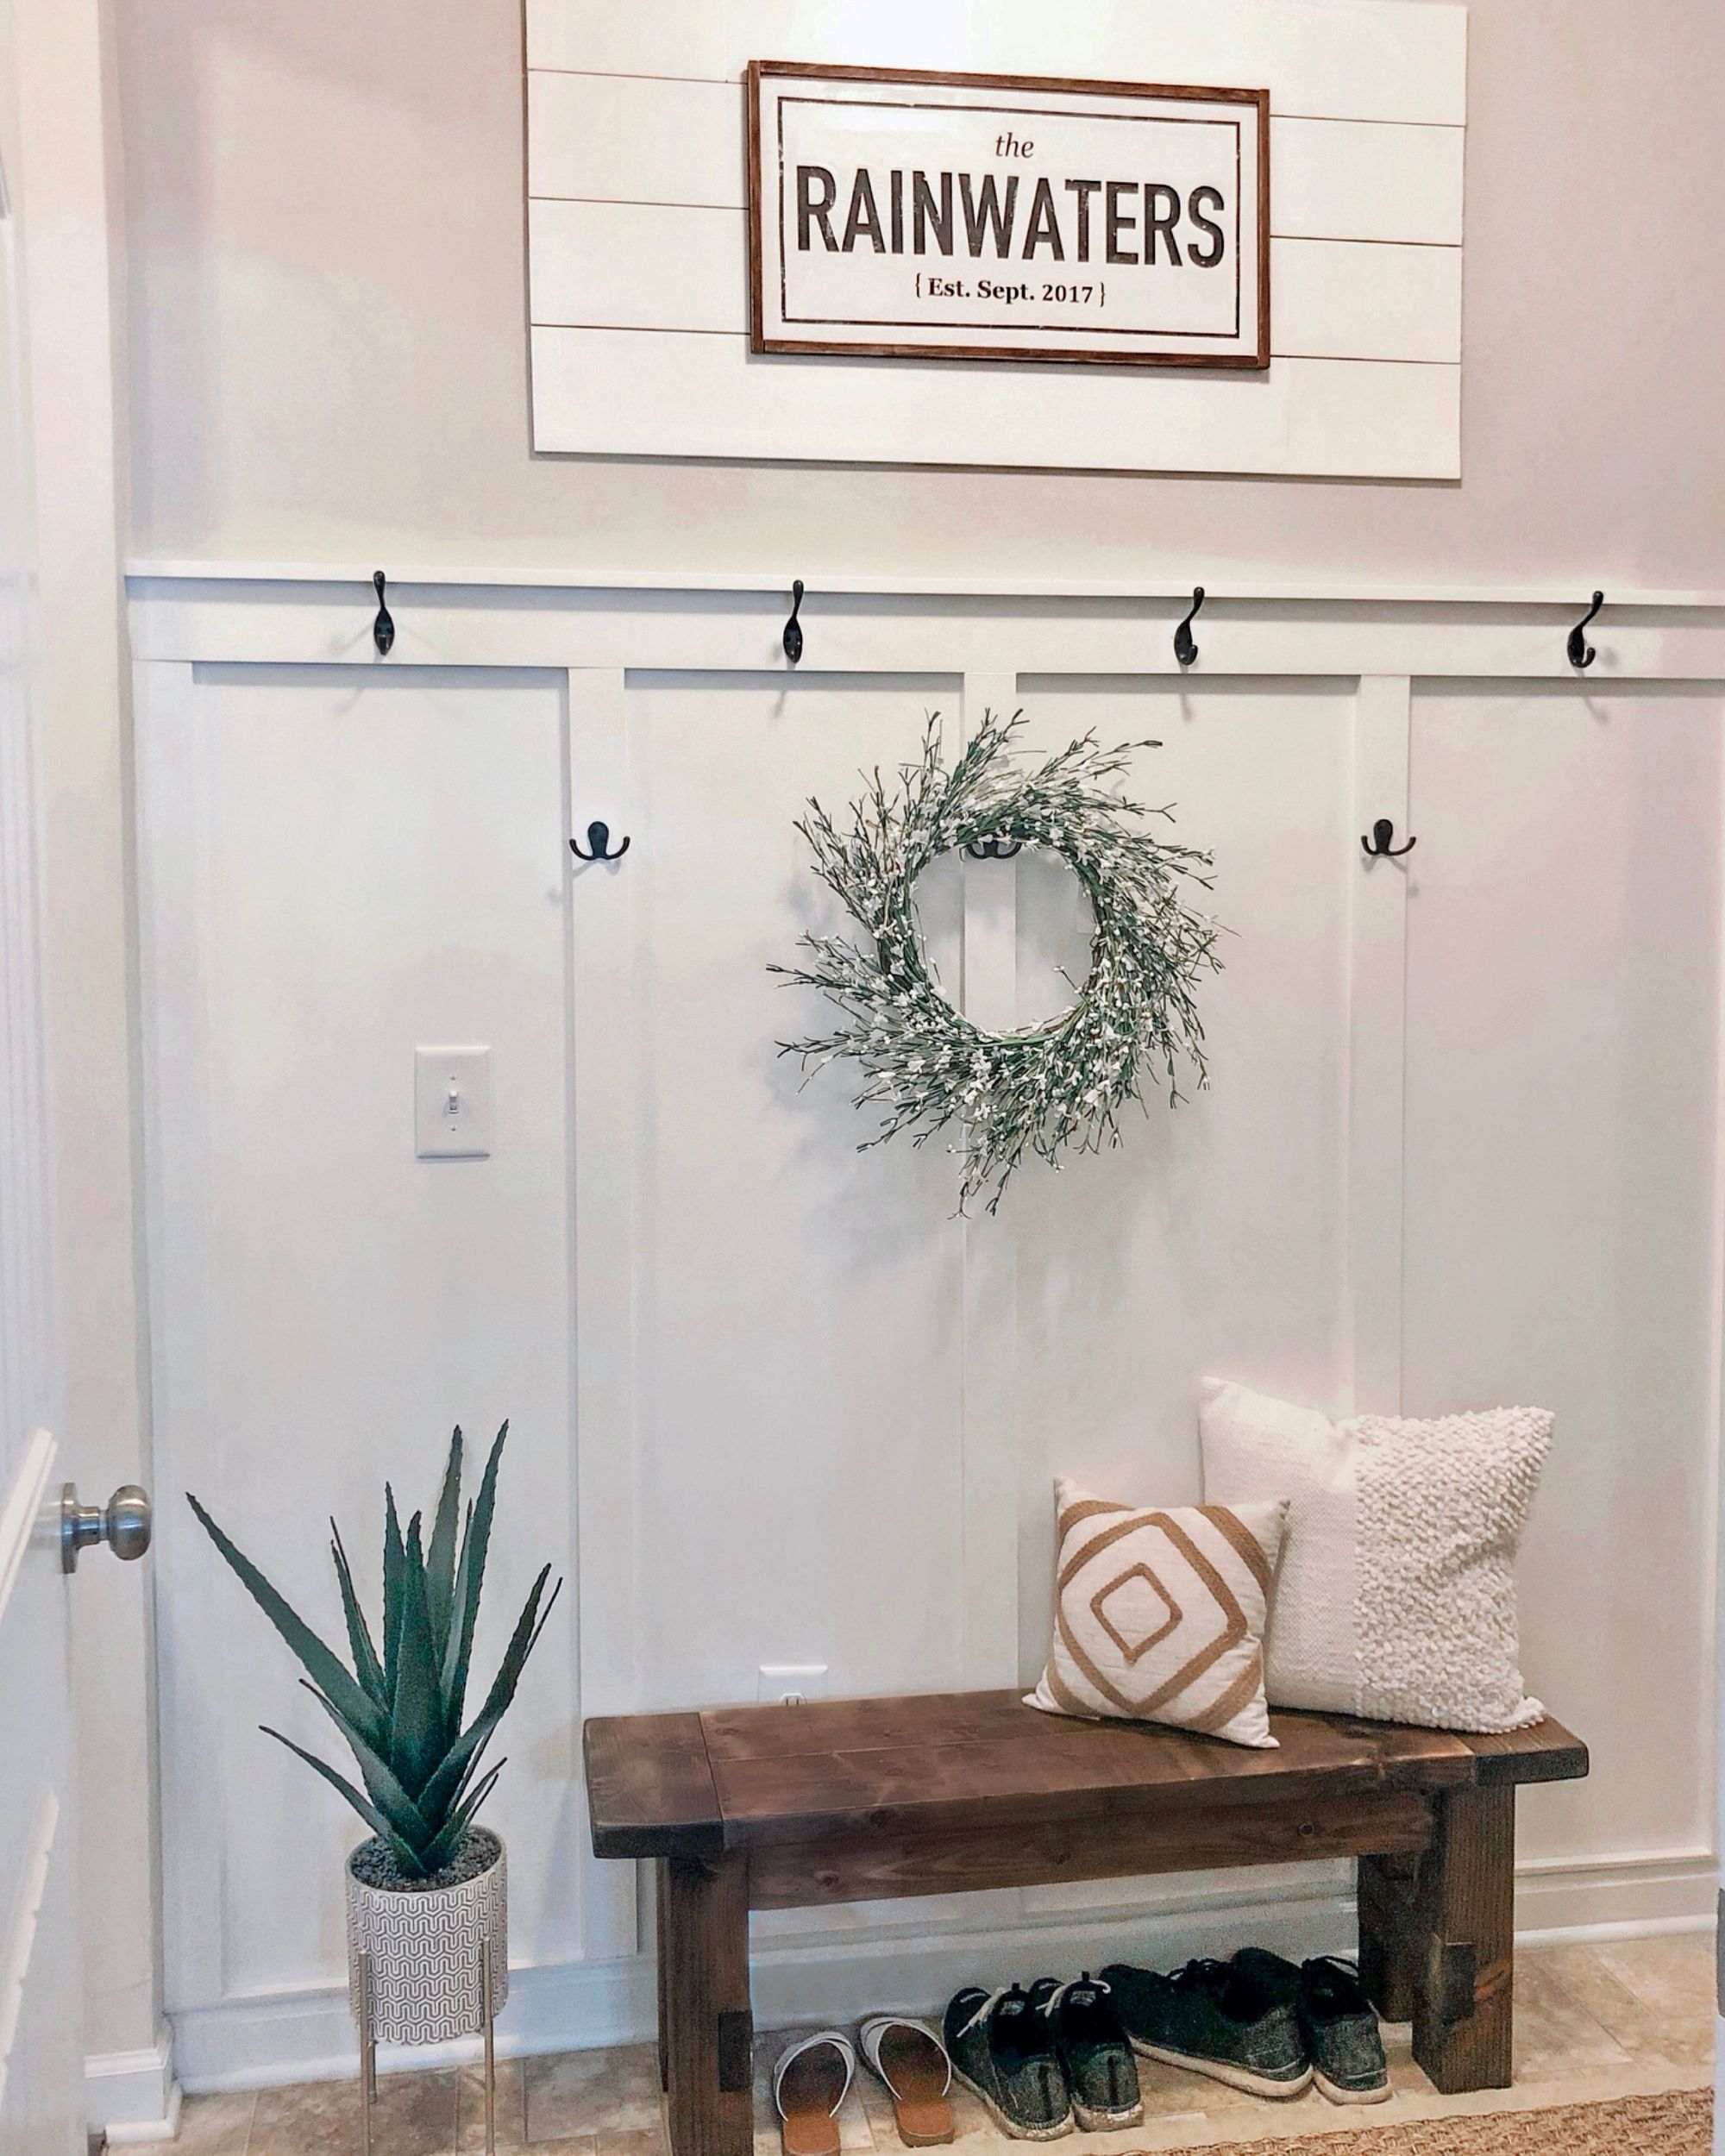
Heres some pics of the finished products we did:
Comments